Discover the real power of Exteryo Safety 4.0

Everything you need is here.

Smartphone, tablet or pc?

Exteryo Safety 4.0 platform can be used via a smartphone or tablet as well as a computer.
Mobile’s app
 available for both Apple and Android.

Click on the icon of your choice to get access to our Exteryo Safety 4.0 app.

Chip or unique code?

The Exteryo Safety 4.0 system can be used either in “smart” mode, through the use of special NFC technology chips, or in analog mode with manual entry of PPE unique codes.

The functionality of the software is identical with both methods, although the use of the chips allows for quick association and reading of information related to individual PPE.

To be able to read NFC chips you must first have a smartphone with this technology (click here to get the full list) or a special NFC reader that can be connected to your computer via USB port or to your tablet via a reduction from standard USB to USB type B or type C.

If you have an ANDROID smartphone, to read an NFC chip through the smartphone you must activate the NFC feature on the smartphone (settings > connectivity > NFC) and after unlocking the smartphone, simply place the back on the chip to activate the communication.

If, on the other hand, you have an APPLE smartphone, the NFC functionality is active by default and therefore within the application you just have to click on the read button and then place the back of the smartphone on the chip.

NFC chips, where to find them?

NFC chips are available in different solutions to be used according to the type of PPE on which it has to be inserted.

The manufacturing partner companies of the system, such as KONG Spa or IRUDEK SL, already mount within a wide range of products the NFC chips uniquely linked to the PPE.

If your PPE is not equipped with an NFC chip, you can easily insert it choosing among the various solutions proposed by Exteryo and its resellers.

Contact your reseller for the NFC chip catalog or write to customer@exteryo-safety.com

Our "Wikipedia" system

Exteryo Safety 4.0 system is developed on a Cloud platform, i.e. on a structure that allows the sharing of part of the data between PPE manufacturers, user companies and inspectors using the software.

The vision of Exteryo Safety 4.0 is to develop a system that is not only a support to the work of individual inspectors or individual companies, but that allow to create a real network between professionals in the same field, able to collaborate and have as focus the safety of workers.

For this reason we decided to develop a common database system for the management of product sheets related to the different models of PPE.

In order to promote the universality of the system and the possibility to manage the highest number of models and brands, the system foresees both the insertion of product sheets by the partner manufacturers and also by inspectors and companies.

These sheets can be shared among all users of the software and, as in the logic of Wikipedia, it will be the users themselves to verify the accuracy of the information, indicating to Exteryo Safety 4.0 any errors through the function “REPORT ISSUE“.

First step in the software

Login and register in the software

Software Access

When you have activated your license, you will receive the credentials to access the system at the e-mail address you provided.

If you have not received any e-mails, please check your SPAM or junk mail folder.

ACCESS VIA SMARTPHONE
To access via smartphone simply activate the application Exteryo Safety 4.0 and you will immediately see the login page.

The credentials required for access are three: LICENSE CODE, USER NAME and PASSWORD

ACCESS VIA PC
To access via PC, connect to the site www.exteryo-safety.com and click on the ACCESS button on the menù bar.

The access page will then appear and you can follow the instructions above to access.

Company data configuration

The first time you log in with your credentials, you will need to associate your company information to use the software.

The required information are mandatory.

Once you have filled in your data, click on the SAVE button.

N.B. Before proceeding to the next page, please read our Privacy Policy and the terms of use of the system, which will be automatically accepted once you have confirmed your company data.

For any further problem, we please ask you to write an email at customer@exteryo-safety.com

User data configuration

Always at the first access you will be asked to create the personal data of your user, entering the data indicated.

In the same page you can also change the password generated for the first access with the one you prefer.

To change the password click CHANGE PASSWORD, enter the password in use and then, twice, the new one.

To confirm the data entered, click on the SAVE button..

Home Page

Once you have logged in you can access the HOME PAGE of the program.

On the left side of the screen is the menu of all the features that can be used with your license or plug-in purchased.

In the upper part of your PC (or lower part of your smartphone) is the management bar, through which you can manage certain actions such as changing plug-in, the administration panel, opening an error ticket or accessing support.

On the main screen, you can view statistics on your use of the software, as well as shortcuts to the main functions.

By clicking on the button at the top, next to the logo, you can reduce the functionality menu to improve the display of the software management pages.

General Settings

Manage your data into the platform

User data

To access the management of your user data just click on the arrow next to the user icon at the top of the screen.

In the drop-down menu you can access the user settings by clicking on the USER SETTINGS button.

In this section you will find the data entered at the first access, that you can modify according to your needs.

The management data are the following:
– USER NAME and LAST NAME
– Access PASSWORD
– EMAIL of reference
– TELEPHONE NUMBER of reference
– TIME ZONE of management (select the English name of the capital of your state or the reference city of your time zone).
– DATE VIEW layout

As a last activity you can select among the active privileges for your user, which ones you want to visualize inside the general menu.

Once you have modified the data, click on the SEND button to store it in the system.

Company data

To access your company data you must click on the ADMINISTRATION button on the management bar and, in the drop-down menu, select the item COMPANY DATA.

In the master data, you will notice the presence of the ACTIVATION CODE generated by the system, which you will need to be enabled by a final company, if it also uses its own license of Exteryo Safety 4.0 (see appropriate page).

To modify the information, click on the CHANGE COMPANY INFORMATION button and enter the new data.

If you have purchased a FULL license of ES4.0 you will find the possibility to upload in the platform also the company logo, for the customization of the inspection reports.

After updating the data, click on the EDIT button to save the new settings.

User management

Only multi-user licence

With the USER MANAGEMENT function you can set the main system functions related to the single user.

If you have enabled a license for 2 or more inspectors, you will be able to manage also the new users who will use the system for inspections.

To add a new user, click on the appropriate button in the options bar and fill in the user registration form, entering the various items required.

In the PRIVILEGES section you can decide which features the new user will be able to see with his access.

Select the checkbox related to the desired feature to activate it for the new user.

Once you have defined the data of the new user, click the SEND button to carry out the creation of the user.

Then provide the access data to the new user to let him use the platform.

Using the EDIT USER button you can modify the data of each user whenever you want.

Using the REMOVE USER button you can delete that user, removing him from the use of the platform.

For each user created it is possible to associate a BADGE to enable the ELECTRONIC SIGNATURE of the inspection reports (See page INSPECT PPE). To associate the badge click on the appropriate button and read a new badge with your smartphone or NFC reader. Once associated, it will be possible to visualize “YES” in the appropriate column..

Automatic email settings

Receipt of automatic e-mails from the Exteryo Safety 4.0 system will allow you to keep up to date with future PPE management activities.

You can activate and manage the sending of these emails by clicking on the small arrow next to the user icon and then selecting the item EMAIL SETTINGS.

Once the Email settings page is open, enter the email address to which the notifications should be sent.

Then select which type of notifications you want to send to the given user and the time interval with which the messages will be received.

Once all the parameters have been set, click on the SAVE button.

Inspector electronic signature badge management

Within the USER MANAGEMENT functionality, you will also have the possibility to associate the badge dedicated to the electronic signature of the inspections by the inspector (see also page INSPECT PPE).

This action is necessary to guarantee an adequate level of security when signing an official and legally valid document.

Inside the table of users, on the line of the single user there is a special button to link the badge to the inspector.

After clicking the appropriate button you have to place the NFC badge on the smartphone or on the appropriate reader to enable it.

Once a badge is enabled to an inspector it will no longer be possible to associate that badge to another user.

Visit our store for buy the badges for the electronic signature or contact one of ours distributors.

License status

Always within the ADMINISTRATION menu you can find the LICENSE STATUS function to check the type of license activated and the date of expiration or possible renewal of your license.

We remind you that your license plan is activated for a maximum number of users (inspectors) manageable within the platform and for a chronological period of 1, 3 or 5 years.

If you need to upgrade the number of workers you can contact us at customer@exteryo-safety.com to evaluate the new license plan.

Inspector management

Within the MANAGE INSPECTORS function, in the ADMINISTRATION menu, you will have the possibility to enable internal or external inspectors for the periodic inspection of your PPE.

Enabling a new inspector will allow the sharing of all information relating to the PPE to be inspected between your company license and its inspector license.

Similarly, if the inspector has already carried out activities on your company PPE before your purchase of the EXTERYO SAFETY 4.0 license, once it has been enabled, you can view your PPE managed by the inspector directly within the PPE ARCHIVE .

To enable an inspector, click on the ENABLE INSPECTOR button, located on the top page of the page, and enter the two-block activation code that must be provided by the inspector.

Once the code has been entered, click on SEND and the inspector’s data will appear in the appropriate table.

General Settings

The main settings for use of the system, applicable to each user who will have access through this license, are entered within the GENERAL SETTINGS function.

To date, the general settings to be defined within the page are the following:

ELECTRONIC SIGNATURE
Defines the possibility of signing the documents generated directly through the software and in different ways:
Badge only: the unique code linked to the badge and the relative associated user / worker will be recorded

Calligraphic: allows the possibility to write the signature via the smartphone or a special tablet for PC.
Calligraphic + Badge: allows the possibility of a calligraphic signature but the validation must be provided through the badge associated with the signer.

CORPORATE DISCLAIMER
Should the company wish to insert its own disclaimer (e.g. company policies) within the PPE or Fastcheck Delivery/Return documents.
To insert a disclaimer, activate the button related to the chosen item and then click on the pencil-shaped button that will appear next to the writing. The Disclaimer can also be entered in different languages, if necessary and will be displayed according to the language selected by the user.

REMOTE DELIVERY / RETURN PPE
In the general settings, the remote delivery/return function of the PPE can also be activated (see specific page) and the maximum time of days within which the worker must sign the remote delivery/return document can be selected.

Once you have selected the preferred option, click on the SAVE button.

Data Synchronization

Make your platform ready to use

Create corporate PPE Register

Before starting any activity through the Exteryo Safety 4.0 platform it is necessary to be able to synchronize the data deriving from the PPE management activity developed up to now by your company.

The first step is to upload your corporate PPE catalog to the platform with all the PPE models used.

To carry out this activity, you will need to access the COMPANY PPE CATALOG function in the ARCHIVES menu.

By clicking on the ADD PPE MODEL button at the top of the page you can access the Exteryo Safety 4.0 database with all the models already present in our library.

Use the search parameters to find the PPE model that is part of your catalog and then click on ADD MODEL to add it to the company’s PPE catalog.

For each model added to the catalog from the Exteryo Safety 4.0 database it will be possible to change its name, as well as insert a company technical specification and any notes. To remove the product from the catalog, just click on the appropriate button.

On the next page we see how to add a model not present in the ES4.0 database.

Create new PPE model

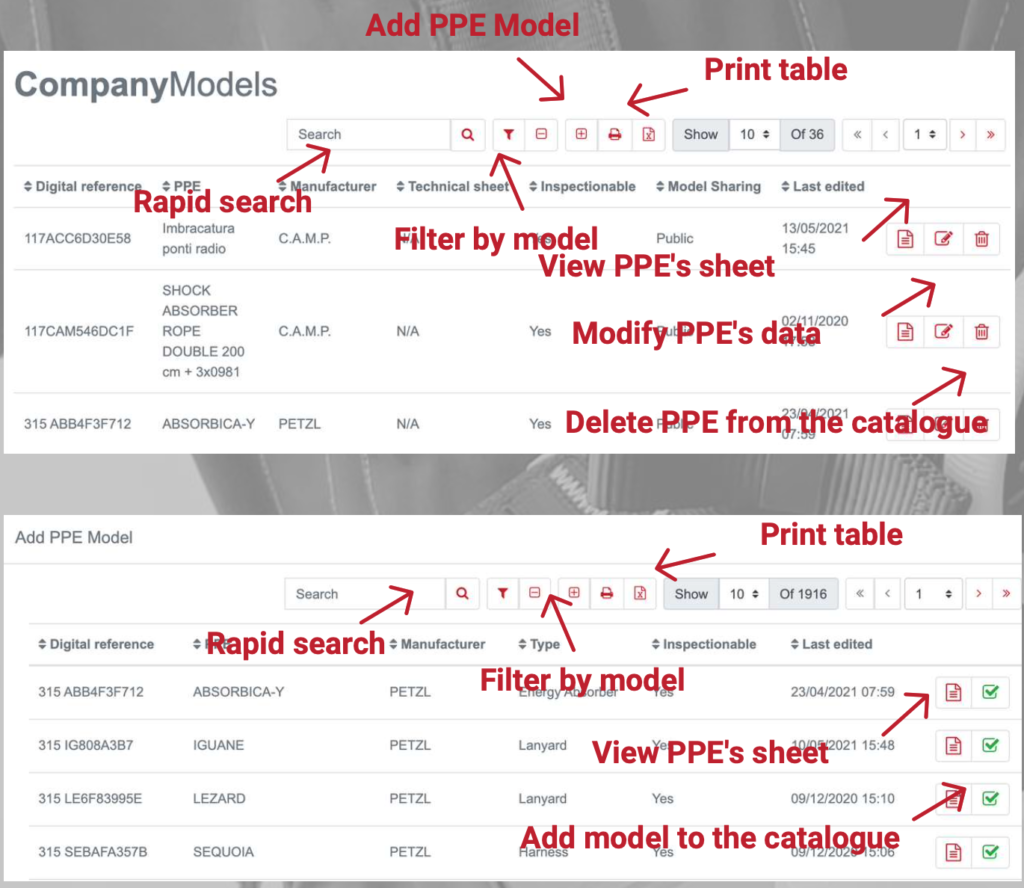
If a PPE model you use is not present in the Exteryo Safety 4.0 database, it can be created directly by you in the ADD PRODUCT section of the COMPANY PPE CATALOG function.

To create a new PPE model click on the appropriate button located at the top of the page.

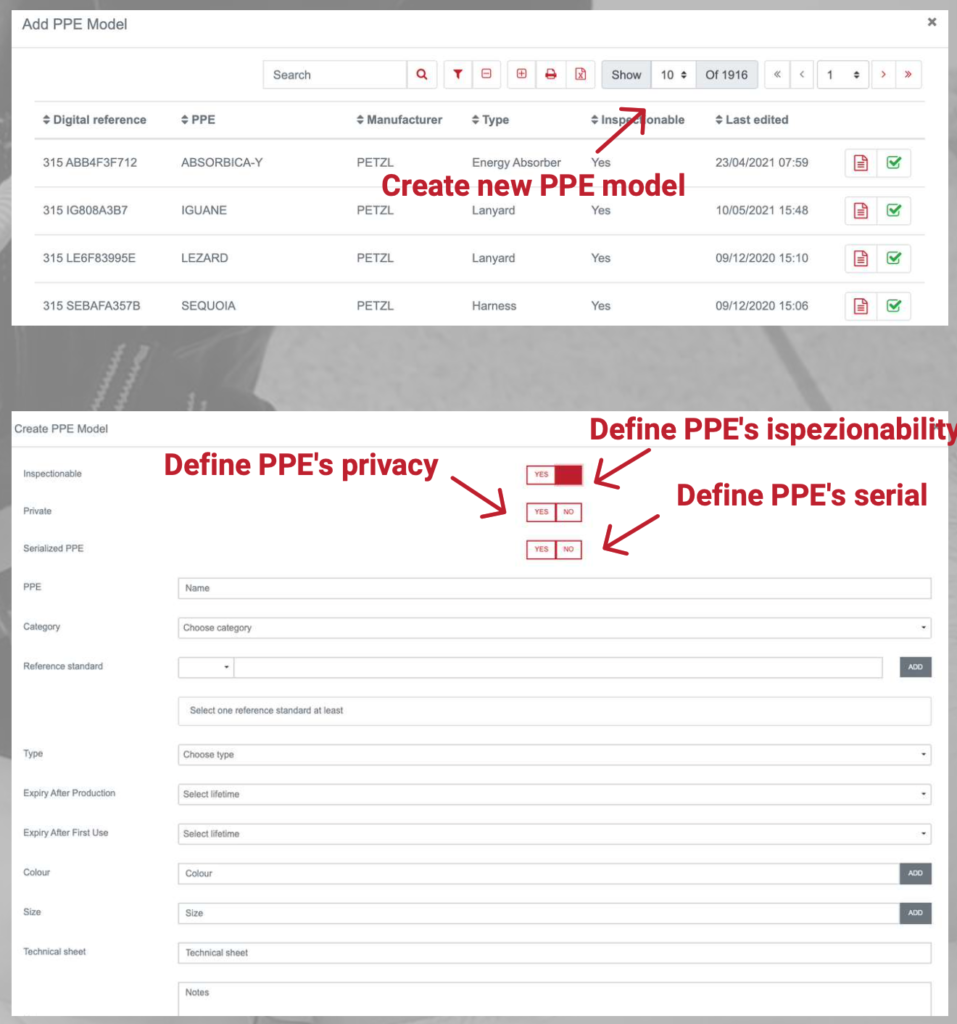
When a new model of PPE is created, first of all it is necessary to indicate whether this model is INSPECTIONABLE, i.e. it requires periodic verification by a competent person (inspector).
All models created under the inspectable option will be public, i.e. shared with the entire system community within the Exteryo Safety 4.0 database with the information you enter.

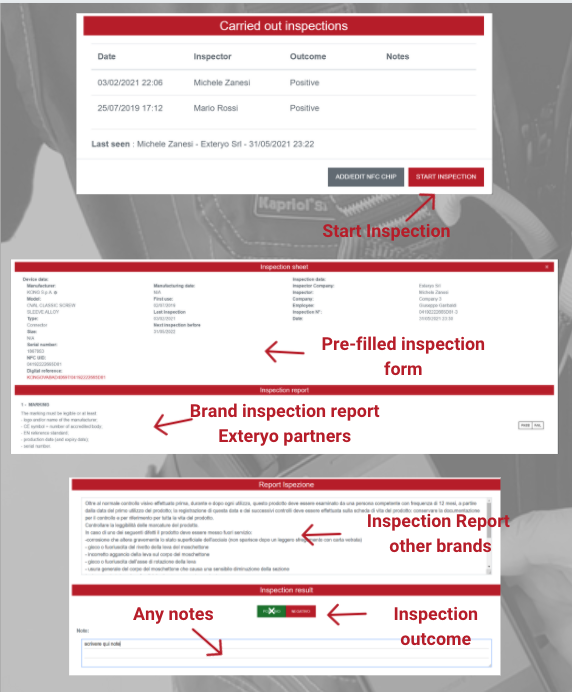
Furthermore, for each model that can be inspected, an inspection report must also be added by you, i.e. an indication on the activities to be carried out for proper maintenance of the PPE relating to that specific model.

The non-inspectable models, on the other hand, can be public or private (visible only on your platform) depending on your needs.
It is advisable to indicate as public only the products for which you have all the information provided by the manufacturer.

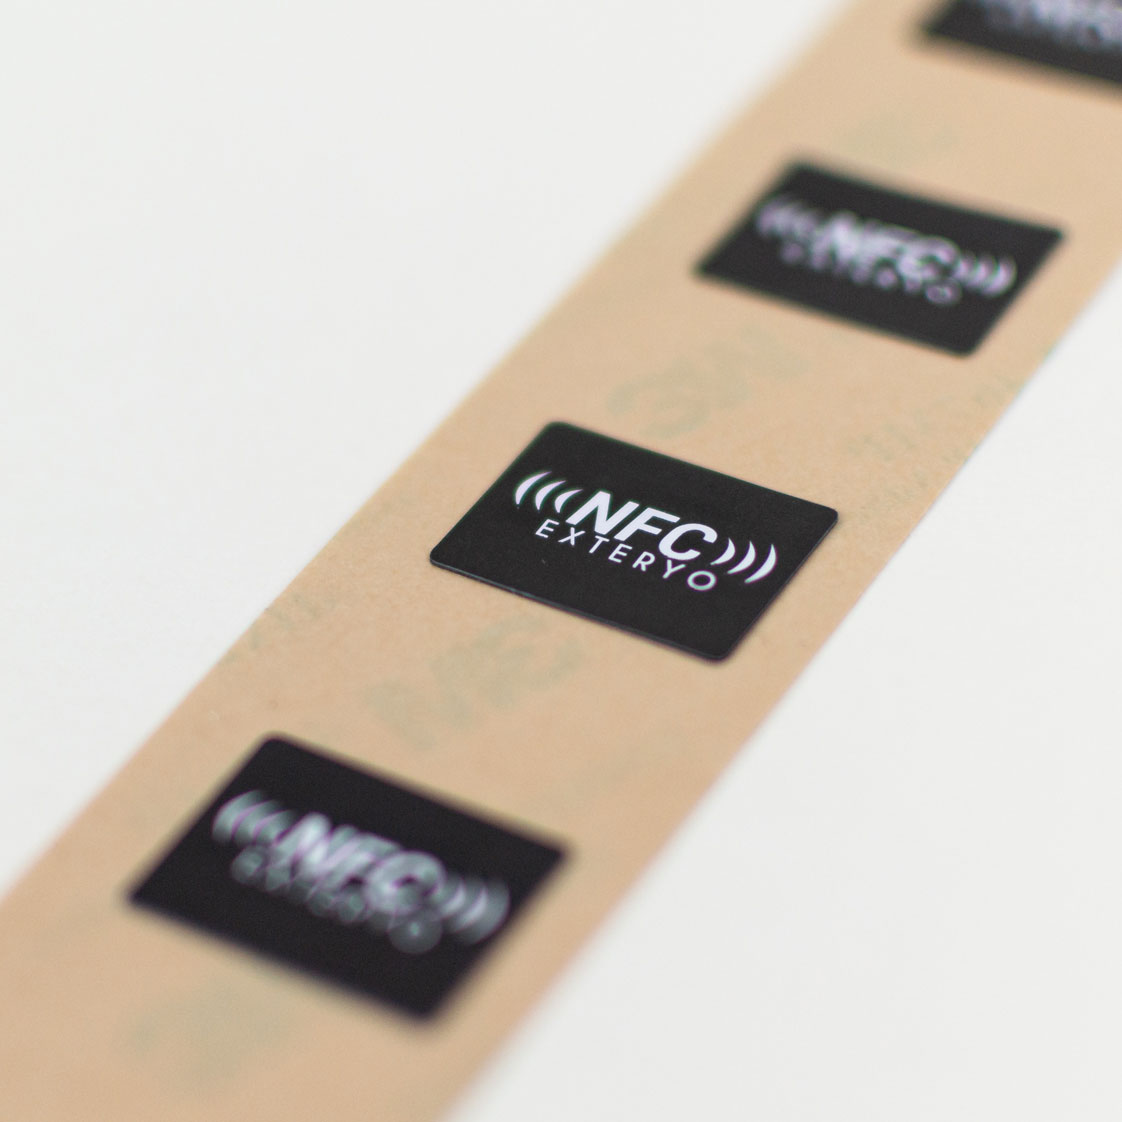
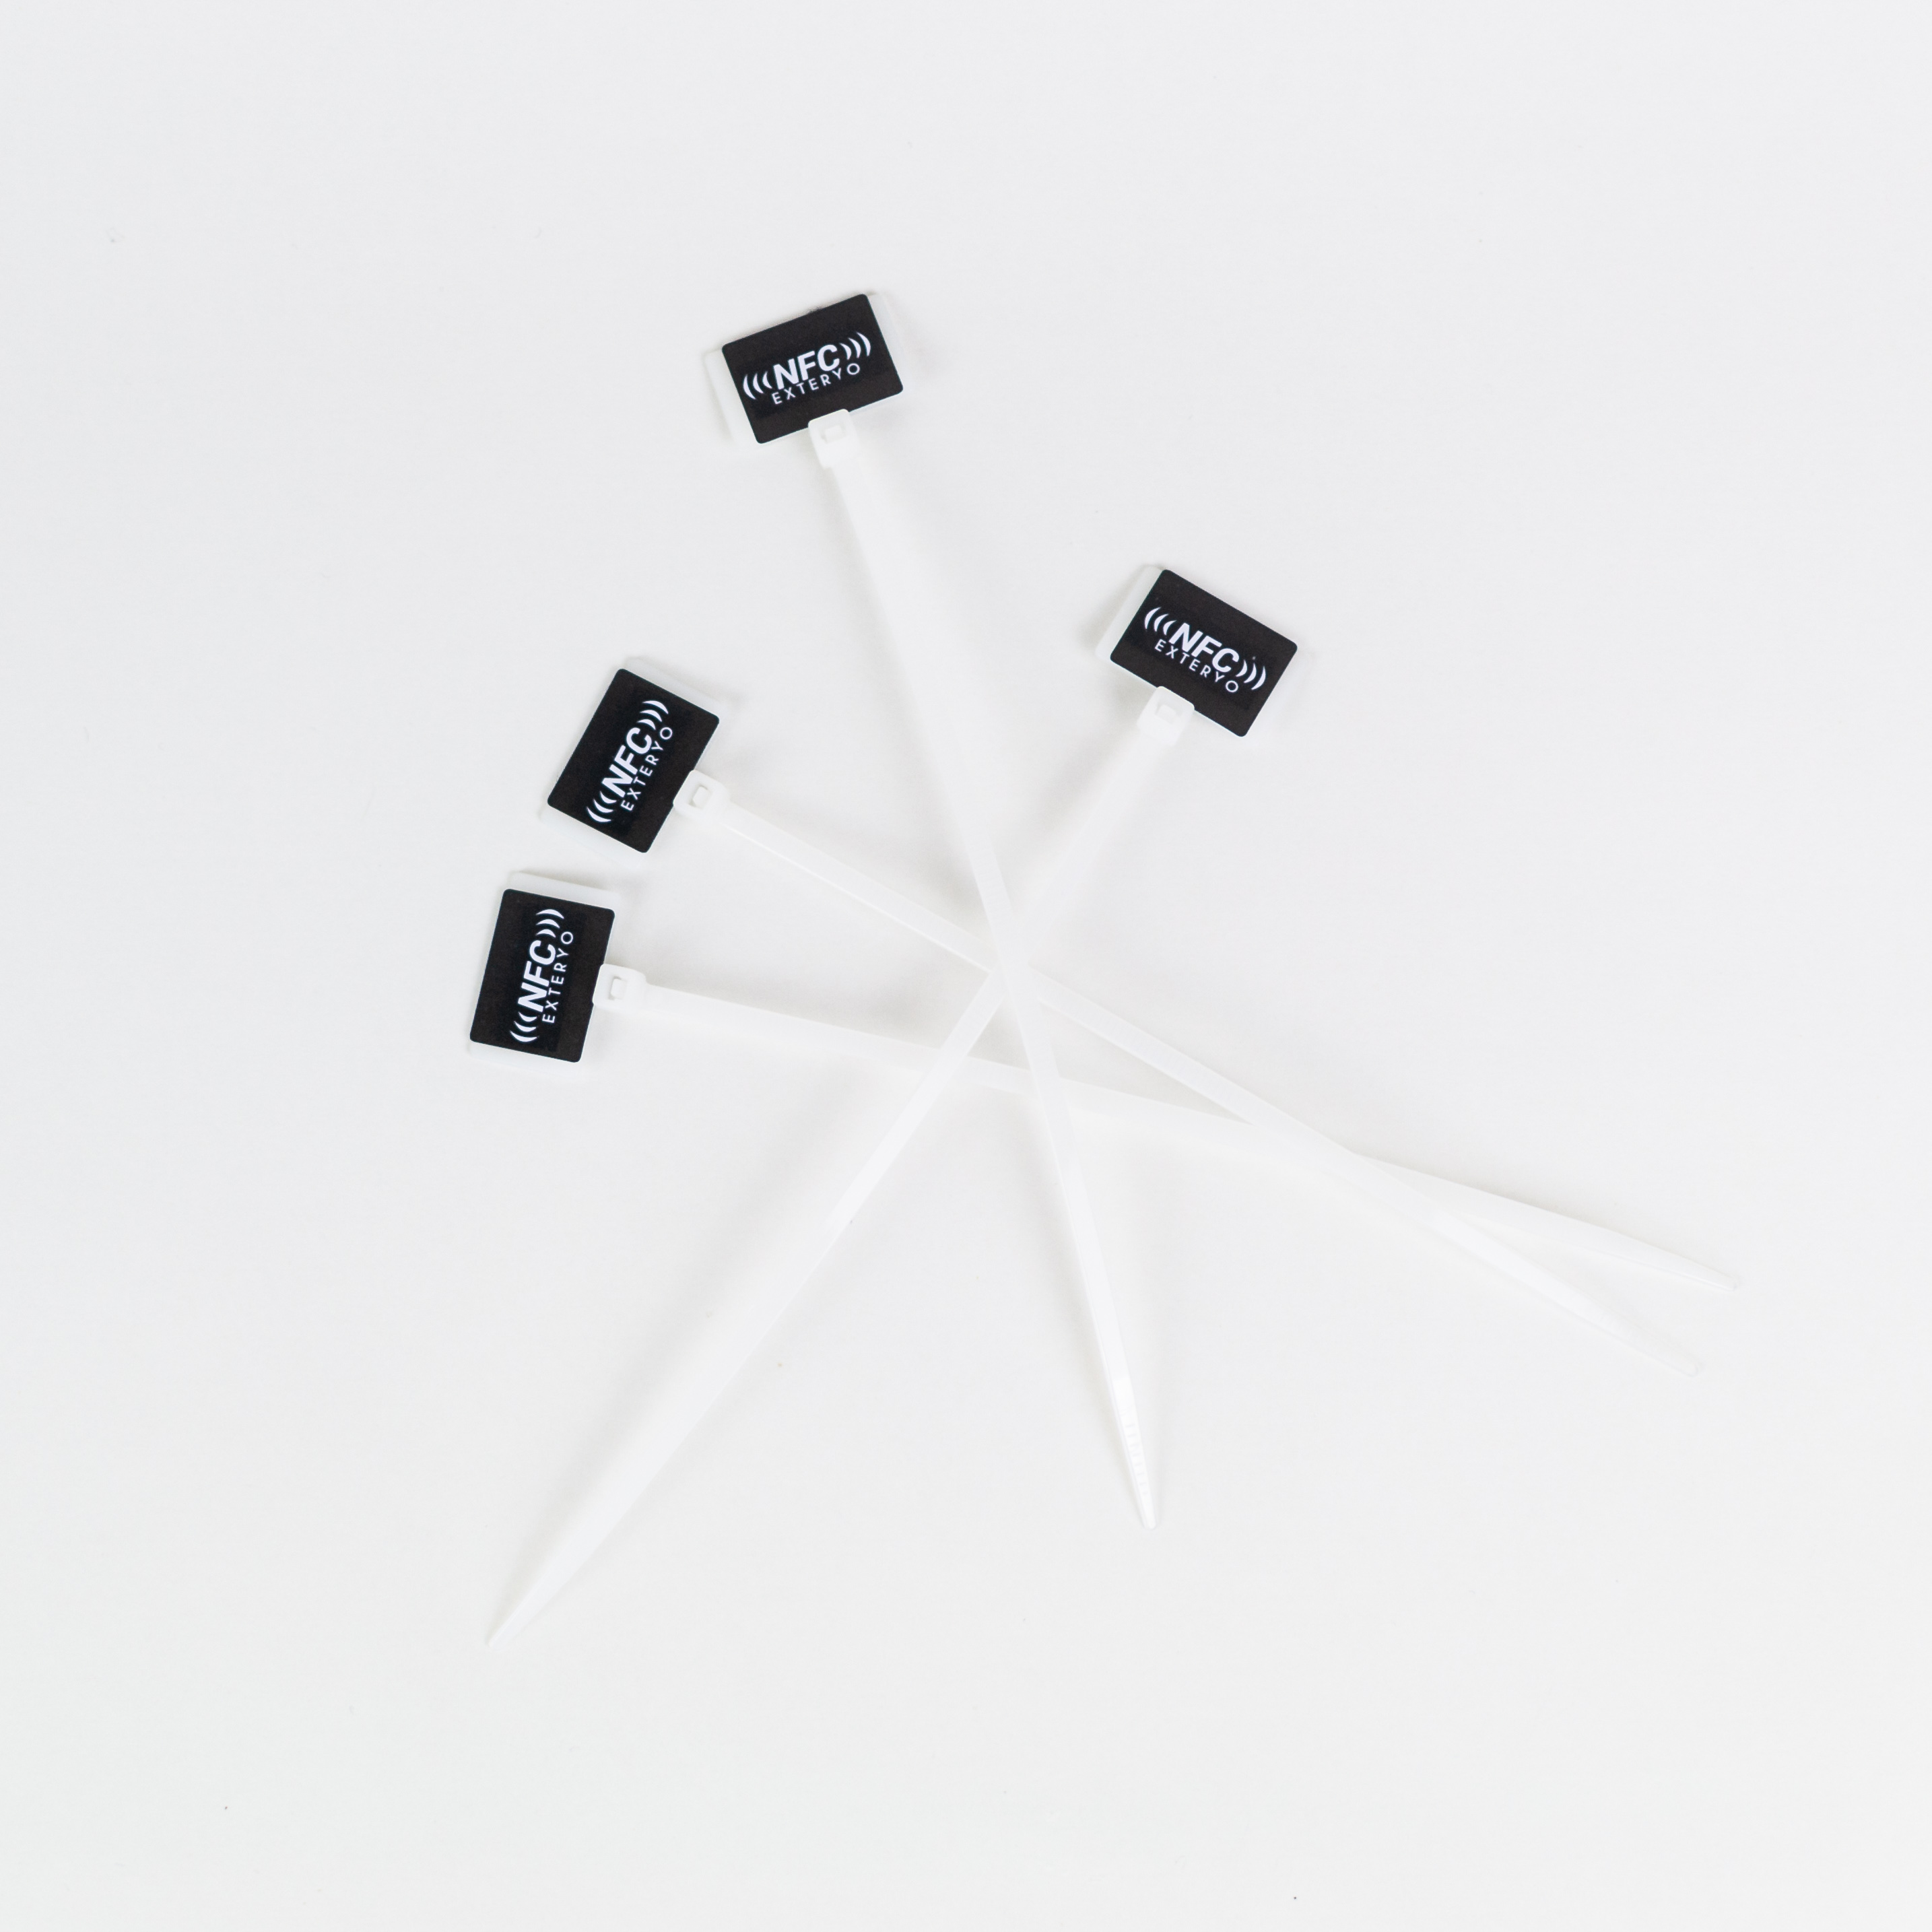
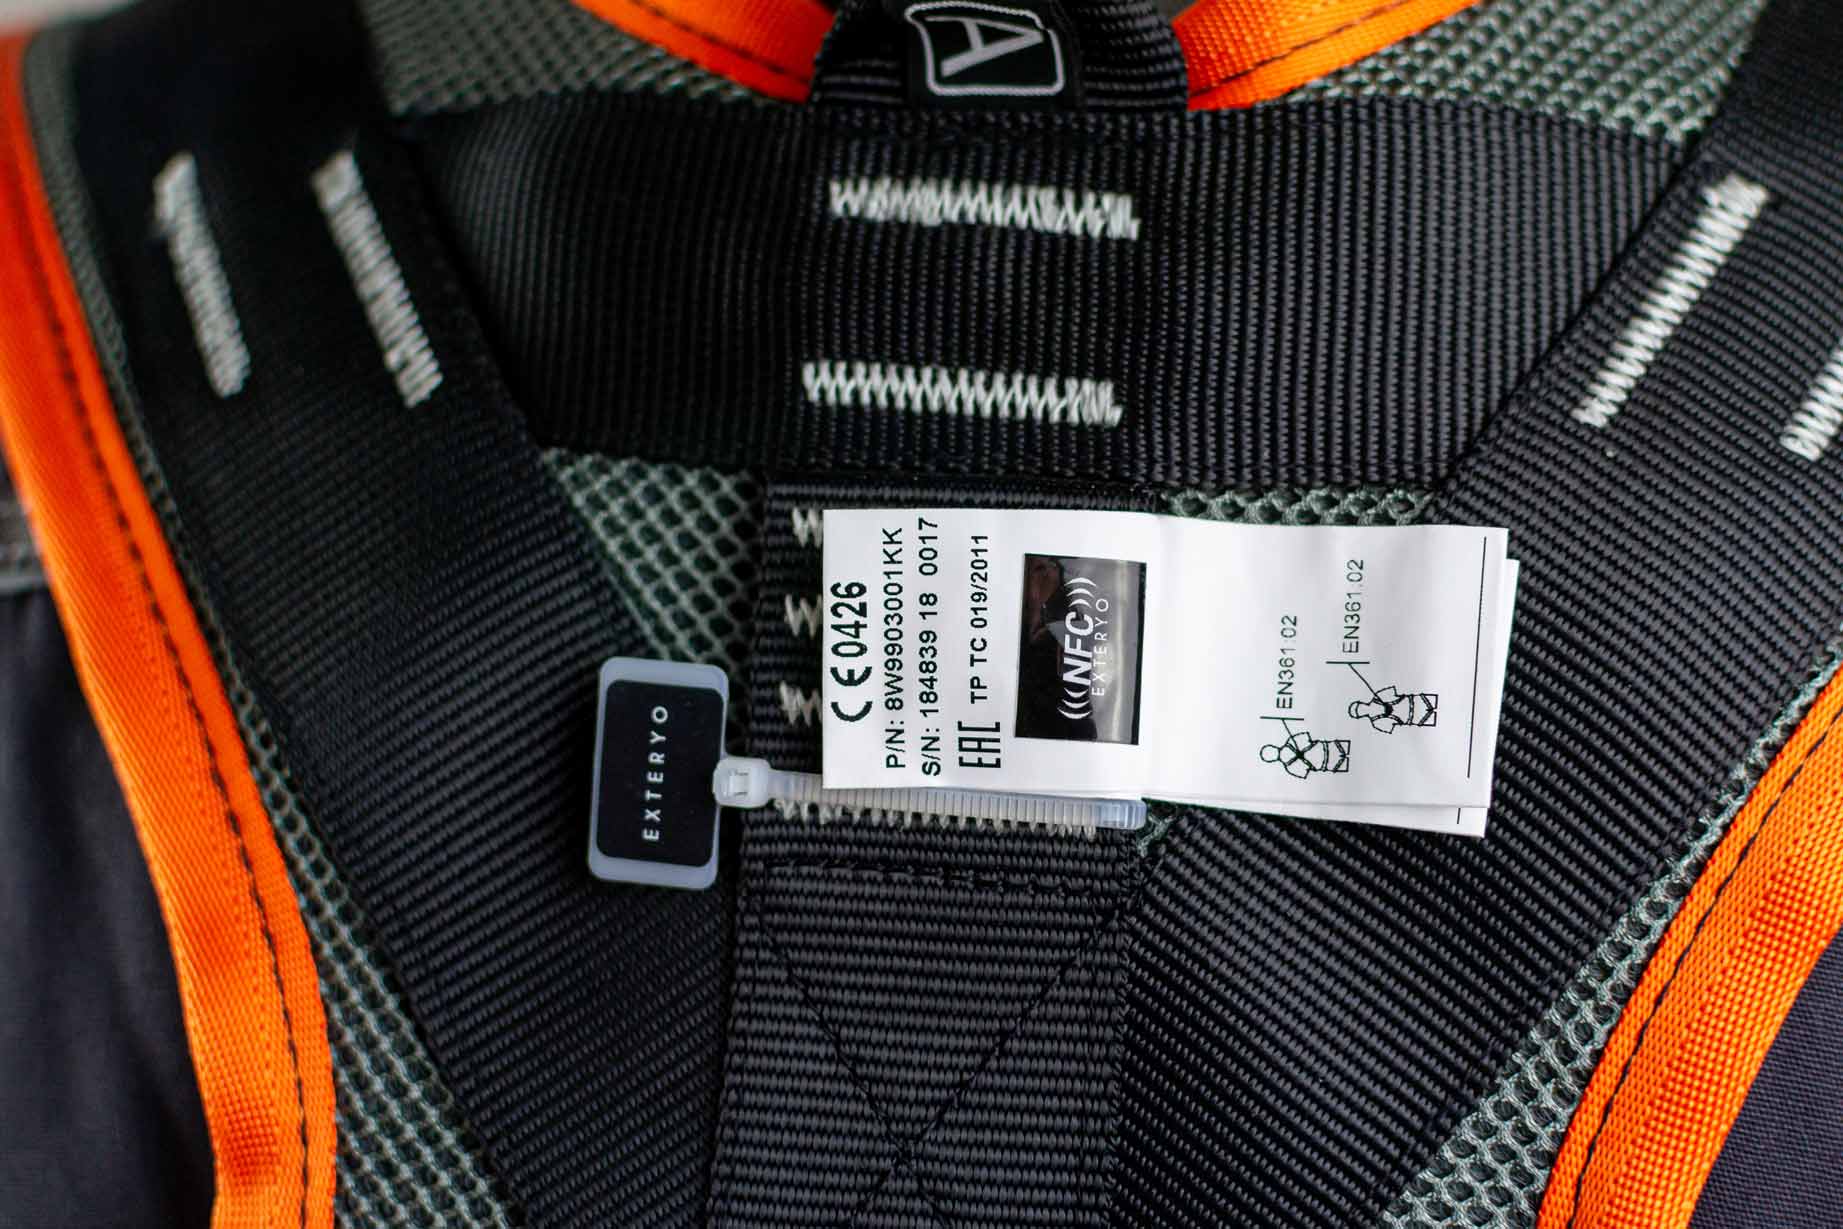
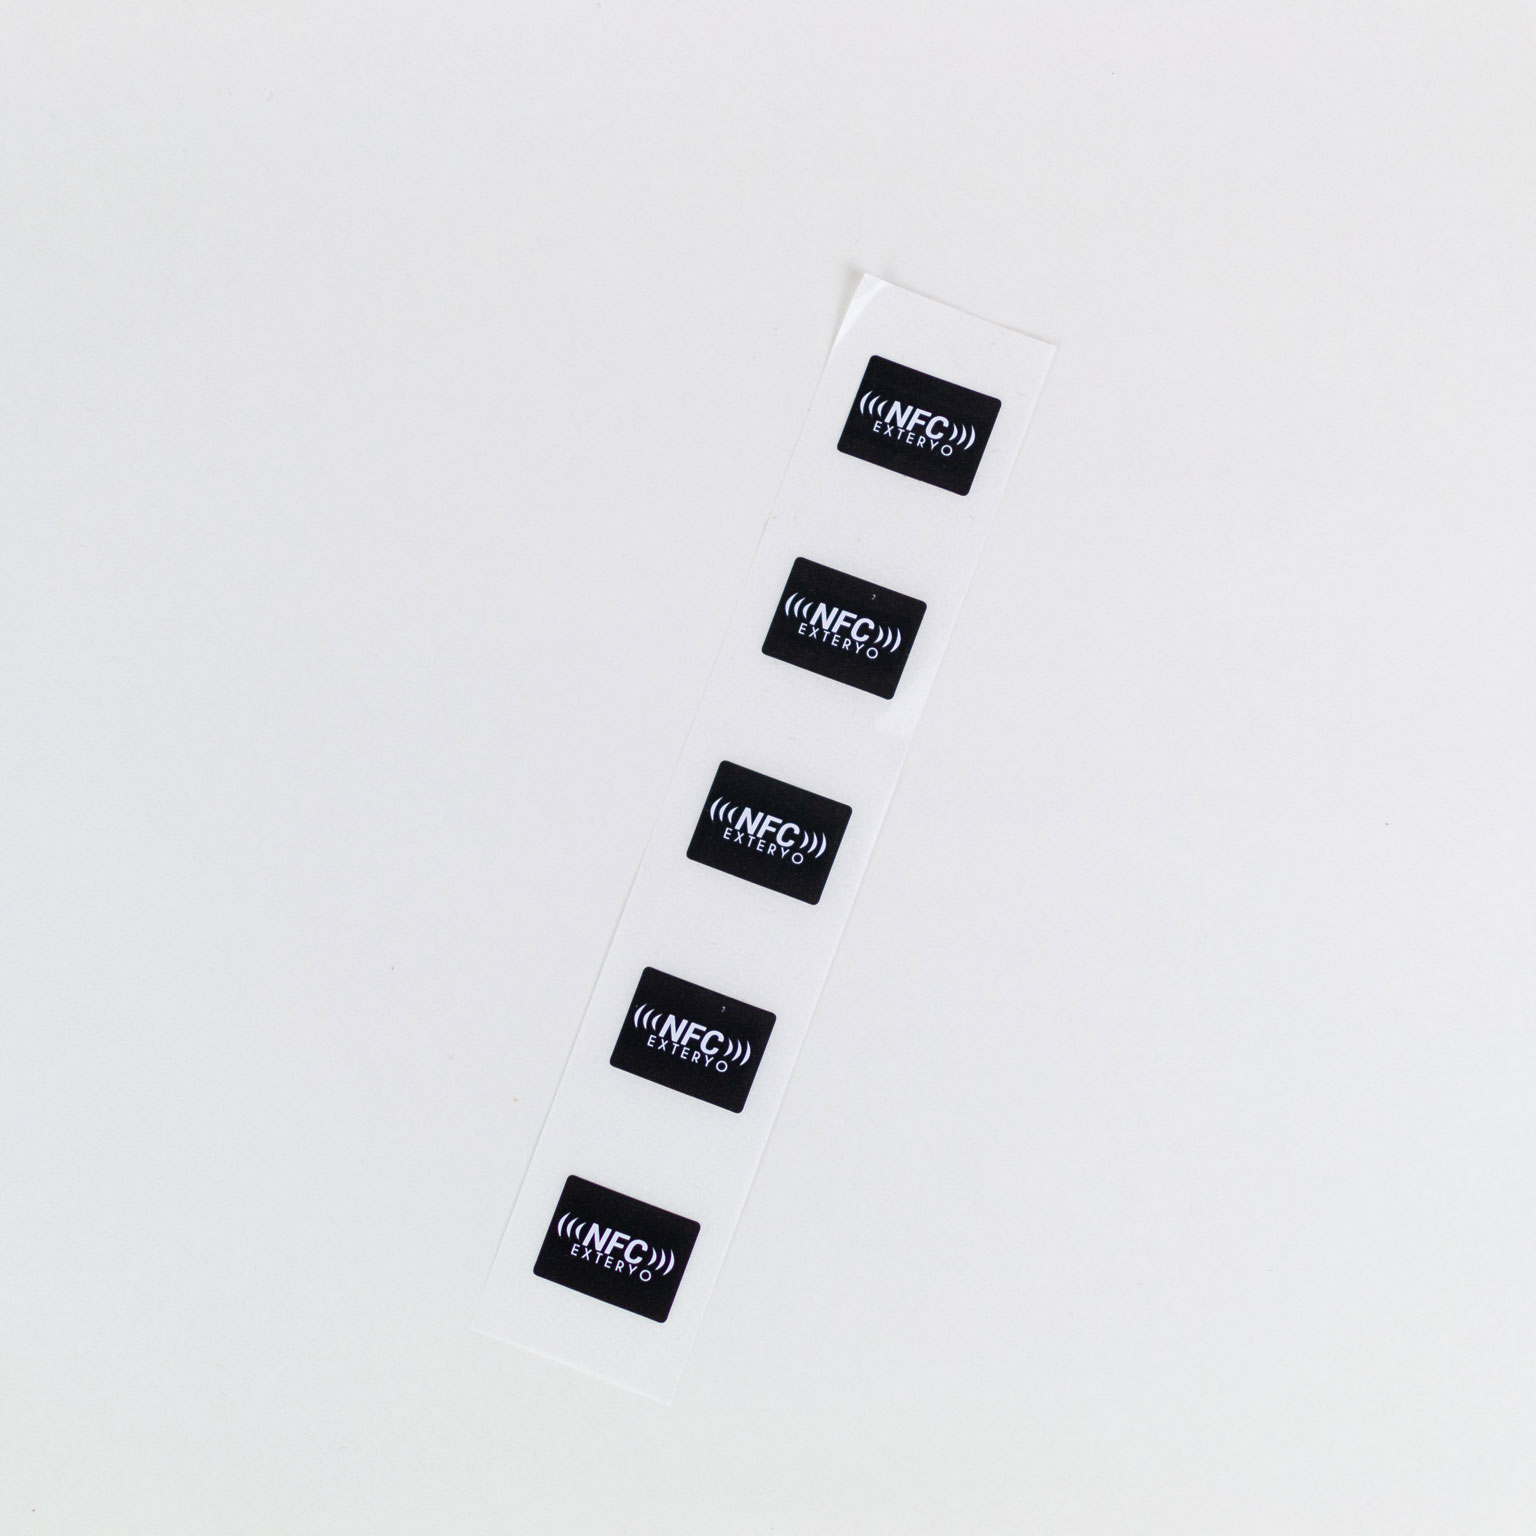
Finally, for products that cannot be inspected, you must indicate whether there is a unique serialization for each individual product (with serial code or NFC chip) or not.

Once you have set these first details, fill in the additional data as required by the compilation form and then click the SEND button.

Create worker register

To enter the workers to be managed via the platform, select the WORKERS REGISTER function in the ARCHIVES menu.

You can add each individual worker by clicking the ADD EMPLOYEE button at the top of the page and filling in the entry form with the data of each individual employee.

Alternatively, you can massively insert the company’s workers by importing with EXCEL files. To carry out this activity, click on the IMPORT EMPLOYEES button, again at the top of the page and download the excel template provided. Once the template has been filled in, press BROWSE to find it on your PC and then UPLOAD to upload it to the database.

At this point you can view the list of employees in the employees table, using the search parameters to filter the information according to your needs.

By clicking on the ASSIGNED PPE button, located in the last column of the table, it will be possible to view the PPE available for each employee.
Also in this case there is the possibility to filter the data for any specific searches.

For each created user it is possible to associate a BADGE for the ELECTRONIC SIGNATURE of the PPE supply and return documents (see dedicated pages). To associate the badge, click on the red button depicting a badge and read a new badge with the smartphone or NFC reader. Once associated it will be possible to display “YES” in the “BADGE” column.

Insertion of PPE already in use

To import the PPE already managed by your company, go to the PPE ARCHIVE function, in the ARCHIVES menu.

By clicking on IMPORT DPI, located at the top of the page, you can access the DPI import section via Excel file.
To import, download and fill in the import template.

The data requested in the template are the following (* when mandatory):

  • Digital Reference*
    The identification code of a specific PPE model within the ES4.0 platform. You can find the digital reference of each model in the COMPANY PPE CATALOG function, in the first column of the table.
  • Size & Colour
    The insertion of these data must faithfully respect the indication on the PPE model sheet (eg if it says “WHITE” or “L / XL” size, report exactly this written including capital letters, spaces and special characters).
  • Date of production
    The insertion of the production date is not mandatory at this time but will be required to view the product sheet or before the inspection of the PPE or the supply / return of the product.
  • Date of first use and last inspection
    The date of first use will be requested only during the inspection of the PPE if the product is associated with a worker.
  • Worker serial number
    Entering the employee number is essential to assign the PPE to a specific employee. Without this data, the PPE will be assigned to the warehouse.

Insertion of PPE in the warehouse

The last activity to be carried out before starting to operationally use the platform is to insert the PPE already present in the warehouse.
To carry out this action, it is necessary to distinguish between SERIALIZED products and NON SERIALIZED products.

For the insertion of SERIALIZED products, that is for which a unique recognition of each individual PPE is required, the massive insertion in the warehouse takes place in the same way of insertion of the PPE already in use (see “Inserting the PPE already in use”) .

Where instead you want to insert a few serialized products in the warehouse, we recommend the insertion by single product. To do this, go to the WAREHOUSE MANAGEMENT function, within the PPE MANAGEMENT menu.
On this page, click the ENTER PPE IN WAREHOUSE button and then manually enter the PPE serial codes or read the NFC chip associated with the smartphone or the NFC reader for computers.

If the serial code or NFC chip is entered in the database for the first time, you will need to associate the data required for each individual product (manufacturer, product name, any size / color and production date). After adding all the products to the list, click on SEND to insert them in the warehouse.

Within the same function you can also insert NON-SERIALIZED products. To enter these products, select the manufacturer and the product model, including PRIVATE products. After clicking SEND, fill in the format relating to the individual size-color combinations and finally click the SEND button again.

Work with software

Associate products and perform inspections in smart mode

Read PPE

The READ PPE function allows you to quickly consult the information and management history of a PPE.

To access this information, on the page, select the manufacturer and type the unique code of the PPE in the space provided or read the NFC chip via smartphone or NFC reader for PC.

The product sheet will automatically open in which you can consult different types of information:

  • General product information (e.g. category, definition, inspection periodicity …)Unique product information (serial number, production date, expiry date…)
  • Technical information (instruction manual, declaration of conformity, information …)
  • PPE status (indicates whether the PPE is in use, in warehouse, in quarantine or out of use)
  • User data
  • Management / warehouse data (first use, last return and last release)
  • Warnings (indicates the health status of the PPE: status OK, to be inspected, expiring …)
  • History of past inspections

PPE Delivery

The delivery of one or more PPE to an employee can be done in the DELIVERY PPE section in the PPE MANAGEMENT menu.

First, select the worker to whom the PPE must be provided via the appropriate drop-down menu.

If the delivery relates to a NON-SERIALIZED PPE, you must select the model via the drop-down menu and then enter the required data such as size / color or production date.

If, on the other hand, you need to deliver a SERIALIZED PPE then enter the serial code in the space provided or read the NFC chip relating to the PPE via a smartphone or a special computer reader.
The PPE being delivered will appear in the table below.

Multiple PPE to be delivered to the worker can be entered in this table.

After finishing the selection of the PPE to be delivered, click on SEND.

The related PPE delivery report to that particular worker will be automatically generated, including all the data required by law. It is also possible to add notes on the delivery of PPE.

The worker can electronically sign the document to give his consent, simply by reading his associated NFC BADGE via smartphone or special PC reader.

Finally click SAVE AND CLOSE to save the activity within the platform.

Return PPE

In a manner very similar to that of the delivery of the PPE, it is also possible to return a product.

Select RETURN PPE in the DELIVERY AND RETURNS section, and select the name of the worker for whom the return is made.

Then just enter the serial number, read the NFC chip in the case of a serialized PPE or select one of the non- serialized PPE from the appropriate list, also indicating the return method of the product (only for the latter case).

ATTENTION: The selected return method will automatically lead to a change of status of the PPE and in particular:

– Replenishment in the warehouse = no change of status – Not compliant with pre-post use checks = in quarantine and need for inspection.
– End of life = product out of use

Once you have entered one or more products to be returned, click SEND and a PPE return report will automatically be generated which can be electronically signed with the NFC BADGE or with handwritten signature by the worker and then printed or saved in the system.

Remote delivery

In the event that the worker is unable to receive or return the PPE and sign the related document within the company headquarters, it is possible to use the REMOTE DELIVERY / RETURN function to be able to carry out the delivery / return activity in accordance with the current legislation.

The REMOTE DELIVERY / RETURN PPE function can be activated from the license’s GENERAL SETTINGS, in the ADMINISTRATION section.

After having generated the specific delivery or return report within the DELIVERY PPE or MAKE RETURN functions, it is possible to activate the remote delivery or return function by selecting the appropriate button at the bottom of the report.

Once this function has been activated, the worker who must receive or return the PPE indicated in the report will have a certain number of days available to receive or return the PPE and sign the appropriate documents through his WORKER AREA (see specific section).

The number of days available to the worker can be defined by the company manager within the GENERAL SETTINGS of the license.

The person in charge of the delivery / return of the PPE will be able to ascertain the positive conclusion of the relative procedure through the REMOTE DELIVERY / RETURN function, in the PPE MANAGEMENT section.
Within this function, all the Remote Delivery or Return PPE activities will be visible, indicating the date of generation of the document, the data of the recipient worker and the expected expiry date for signing the document.

A colored indicator in the STATUS column indicates if the worker is late in signing the relative document, based on the days foreseen and indicated in the GENERAL SETTINGS.

Worker Area

Each worker registered in the WORKERS REGISTER has his own workers area in which to view the list of PPE at his disposal and sign any DISTANCE DELIVERY / RETURN reports.

Access to the worker area always takes place within the ES4.0 platform but without the use of specific access credentials.
In fact, to allow access to the worker, it is sufficient to connect his personal data to his NFC BADGE through the appropriate function located in the WORKERS REGISTER.

Once the badge has been associated, the worker must access the PUBLIC ACCESS function, located on the Log- in page and then scan their NFC badge using a smartphone or special reader.

Within your Worker Area it will therefore be possible to access the section for viewing the available PPE or the sections for managing and signing the Remote Delivery / Return of PPE reports.

A numbered notification will indicate if and how many remote delivery / return reports are active and awaiting signature.

Fast Check

The FAST CHECK function allows managers and supervisors to create documentation relating to the control of the effective use of PPE by workers.

To start the inspection of a particular worker, first search for the name of the worker in question from the appropriate table.

The table shows for each worker, in addition to his personal details, also the PPE in his possession and the date of the last inspection for him.
To start the fast check, click on the button at the end of the row relating to the worker.

In the Fast Check Report you will have the vision of all the PPE provided to that worker and for each PPE you will have to indicate whether he is actually worn or not, or if it is not necessary for the activity he is performing.

At the end of the assessment, indicate the outcome of the check if it is POSITIVE or NEGATIVE and add any notes if necessary.

To validate the document, use your previously associated NFC BADGE (see User Management). You can sign the document by placing the badge on your smartphone or the NFC reader connected to the PC.

Once you have validated the document with your signature, click the SEND button to save it in the database.

By clicking on the FAST CHECK ARCHIVE button at the top of the page, you will always have access to the history of the checks you have carried out on workers.

Manage PPE and document

Check your product data and documentation

PPE Database

All the PPE entered in the system can be viewed in the PPE ARCHIVE, in the ARCHIVES section.

Each line refers to an exact model of PPE for which several product units may be present. The quantity is indicated in the first column.

The register explains the main characteristics relating to the specific product model, while a colored indicator highlights the status of the PPE.

The indicator in the WARNINGS column indicates the highest level of alert among those of the various products relating to the particular model and present in the archive.

To the right of the status column there is a button that allows you to access the list of the various company products relating to a single model.

Using the search bar or setting the parameters, you can filter the PPE according to your needs, so that you can only view certain products.

It is also possible to download the file relating to the entire table by clicking the appropriate button at the top of the page.

In the display window of the individual PPE by model it is also possible, only for SERIALIZED products, to remove the PPE in question.
The removal can be related to the decommissioning of the product or to the simple removal from its management, eg. in the case of an IPR sold to another company.

Black Box

The black box is the function that allows you to have access to the history of all the operations recorded through the software and all the related documentation.

The black box acts as a sort of search engine in which you can find detailed information on a specific event relating to a worker or to a specific PPE.

The BLACK BOX function is found in the main menu and inside it is presented as a simple table in which each row corresponds to a recorded event.

Alongside each event it is possible to consult and / or print the relative documentation as proof of the activity within the company.

Using the search parameters it is therefore possible to trace the precise event to be found and view the related documentation.

The green sign in the CERTIFICATE column demonstrates the non-manipulation of the data, ensuring that the information recorded inside represents exactly the activity that took place within the company.

Don't miss deadlines

Manage due dates and inspections

Calendar

In the CALENDAR AND ALERTS section you will be able to manage all deadlines and dates related to PPE testing and inspection.

The calendar shows the dates of all company PPE due dates. The due dates relate to either the annual inspection or the expiration date of the product.

Click on the relevant due date notice to get more details on the task at hand.

Events

This section shows an agenda of upcoming deadlines related to IPR managed by the inspector. By using the SEARCH PARAMETERS it will be possible to view all the events relating to a specific time period or to a specific company and/or worker.

The column on the right of the table allows you to view the sheet relating to the product.

It is possible to download the whole general table or the filtered table using the search parameters, by clicking on the appropriate button at the top of the screen.

Alert

The ALERT section works like an inbox and allows you to view the automatic alerts generated by the software and related to the expiry dates of the PPE.

Once a month the software will send a general alert, indicating the list of expiry dates for the following month related to the company’s PPE.

In the case of a default related to the expiration of a PPE or the annual inspection, automatically the system will send a daily alert related to these products.